Dollar Tree Fall Pumpkin Patch Wreath
Spruce up your home for the fall season with this easy fall pumpkin patch wreath craft. Supplies can be purchased at your local Dollar Tree store making it an affordable fall wreath.
Fall is one of my favorite seasons to decorate for. I love the warm and cozy colors the fall season brings with it, the different crafts you can do, decorating pumpkins, and the tasty fall food. Of course, the cooler temps after a very hot summer are nice too!
We always put up a wreath for each season or holiday and we love getting supplies from the Dollar Tree. The supplies are cheap and you can do some pretty creative things with them. This fall pumpkin patch wreath is just one example of a creative craft you can make.
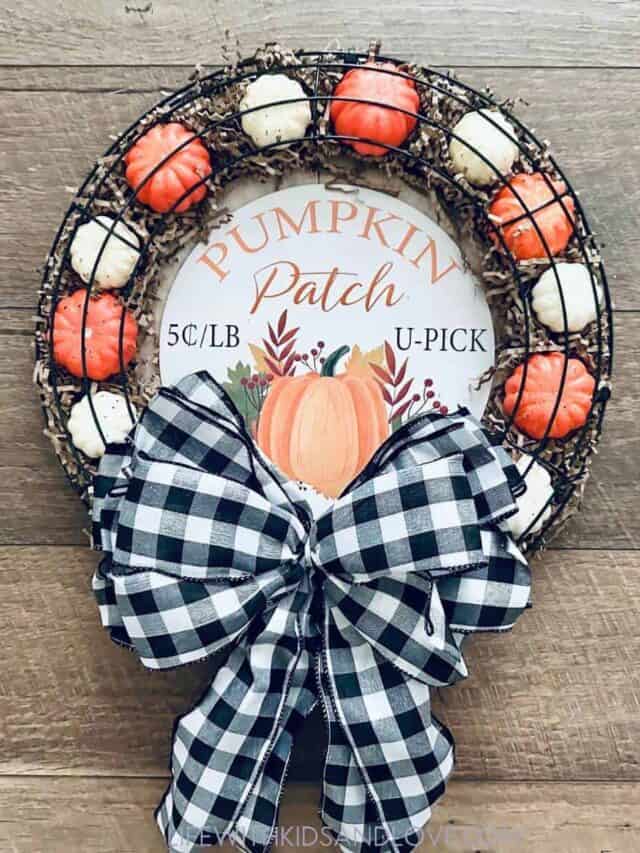
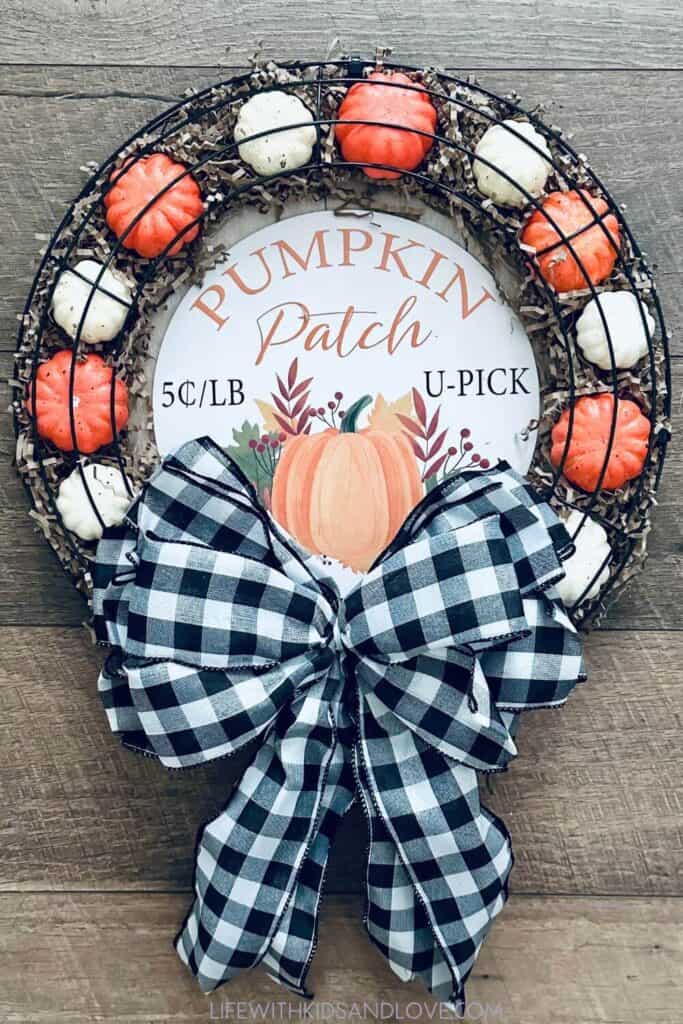
Fall Pumpkin Patch Wreath
Isn’t this a cute fall wreath? I love that it’s so easy to make and that it is a cozy way to welcome guests into our home.
We are still decorating for fall, but it’s coming together pretty well. We have our fall pumpkin patch wreath on the door, the easy Frito chili pie is cooking in the kitchen, and we’ve decorated the house with some other fall decorations.
Supplies:
- (2) 14-inch dollar tree wire wreath forms
- 1 package of Dollar Tree decorative brown shred
- 4 black zip ties
- 2 packages of small pumpkins (one package of white, one package of orange) – sometimes these come as skewers, and those are fine
- Pumpkin patch faux wood sign
- Hot Glue Gun to help secure the sign
Notes:
If you can’t find the pumpkin patch sign at your local Dollar Tree, you can always use another fall sign. Amazon has a variety of different signs that you can use.
Sometimes the mini pumpkins come in a bag or on a skewer. You can use the ones on the skewers to make this fall pumpkin patch wreath, just slide them off the skewer before you use them. You can also change up the pumpkins to create your own unique look for the wreath.
Instructions
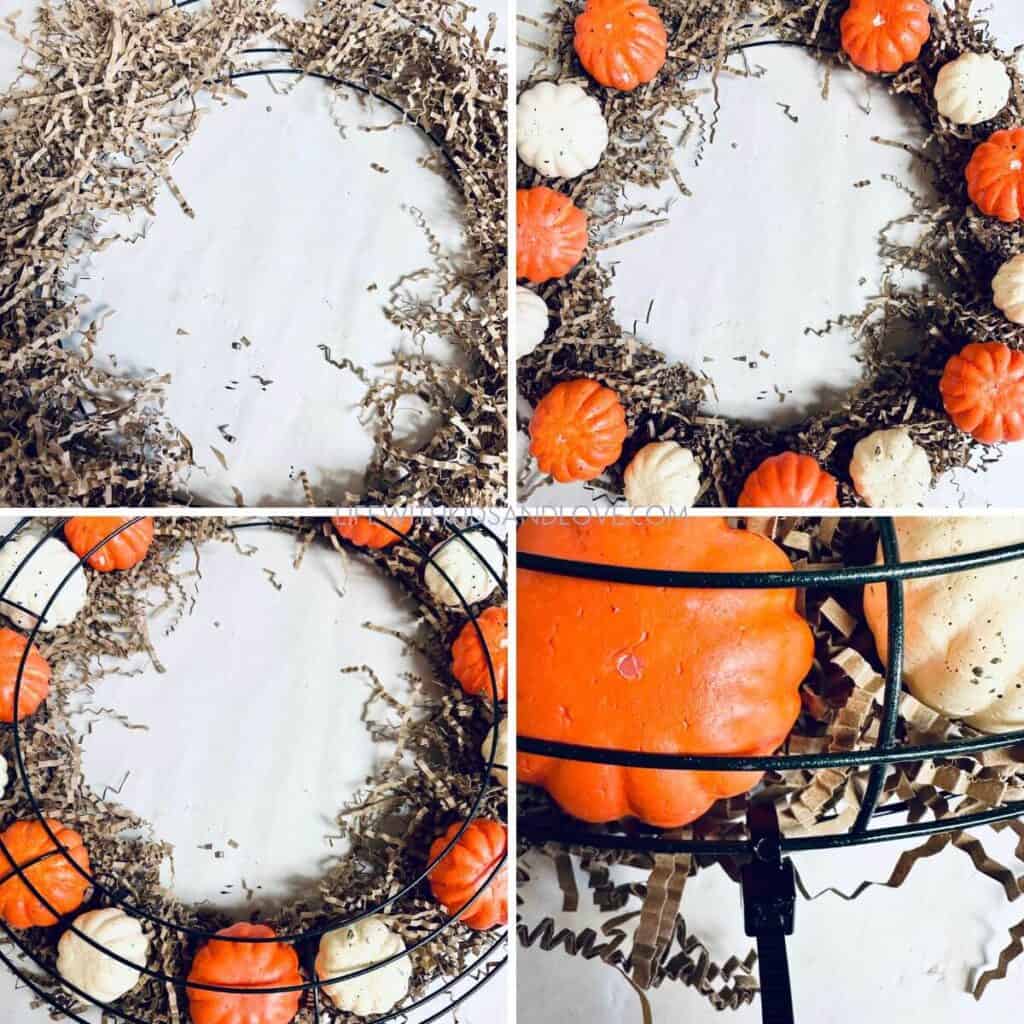
- Flip one of the wire wreath forms over so the rounded top section is on the bottom. This is going to be the start of the pumpkin “cage”.
- Add a layer of the decorative shred to the wire wreath. You don’t need very much, we used less than half of the bag. Once you add your layer you can set the rest of the shred aside and put it away for another project.
- Next, we are going to place the pumpkins on top of the decorative shred. If your pumpkins came on a skewer, pull them off the skewer and place them. For this wreath, we alternated the colors, but you can place them however you like.
- After you have the decorative shred and pumpkins in place, place the 2nd wire wreath form on top and then secure it with zip ties. We used a zip tie at the top, bottom, and each side of the wreath. Make sure to pull them tight so that it’s secure enough to hold the pumpkins inside.
- Attach the premade bow with the twist tie that’s on the back of the bow.
- Lastly, we are going to place the pumpkin patch sign. Since this isn’t really wood, you can easily cut the top part off with scissors. Once you have removed the top, use a dab of hot glue to secure it to the back of the wire wreath form.
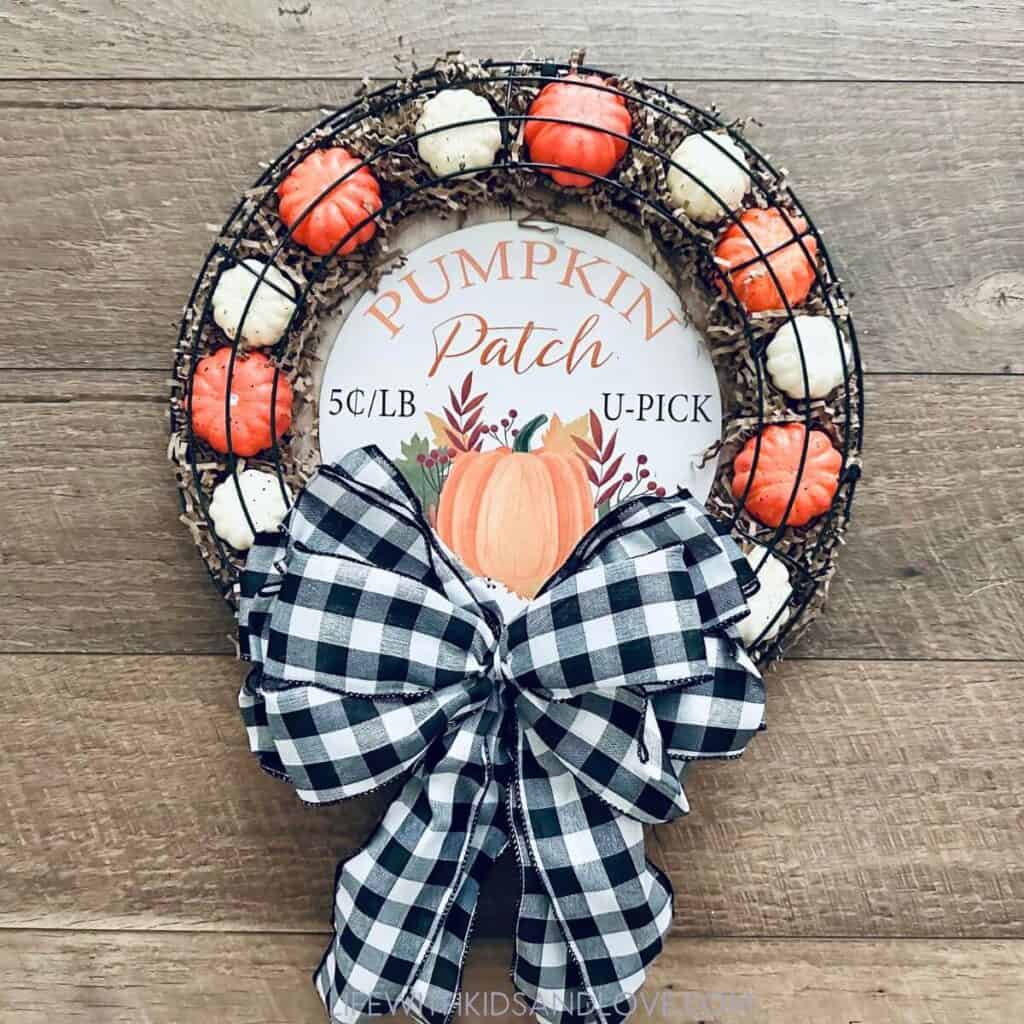
Easy Dollar Store Fall Pumpkin Patch Wreath
I love that the fall pumpkin patch wreath is so easy to make! It’s perfect for fall and adds some fun color and coziness to the front door. We’ve received quite a few compliments on it already so it’s been a hit!
Below you can print out the instructions on how to make the fall pumpkin patch wreath.
Fall Pumpkin Patch Wreath
Materials
- 2 14-inch dollar tree wire wreath forms
- 1 pkg of Dollar Tree decorative brown shred
- 4 black zip ties
- 2 packages of small pumpkins (one package of white, one package of orange)
- 1 Pumpkin patch faux wood sign
- Hot Glue Gun to help secure the sign
Instructions
- Flip one of the wire wreath forms over so the rounded top section is on the bottom. This is going to be the start of the pumpkin “cage”.
- Add a layer of the decorative shred to the wire wreath. You don’t need very much, we used less than half of the bag. Once you add your layer you can set it aside and put it away for another project.
- Next, we are going to place the pumpkins on top of the decorative shred. If your pumpkin came on a skewer, pull them off the skewer and place them. For this wreath, we alternated the colors, but you can place them however you like.
- After you have the decorative shred and pumpkins in place, place the 2nd wire wreath form on top and then secure it with zip ties. We used a zip tie at the top, bottom, and each side of the wreath. Make sure to pull them tight so that it’s secure enough to hold the pumpkins inside.
- Attach the premade bow with the twist tie that’s on the back of the bow.
- Lastly, we are going to place the pumpkin patch sign. Since this isn’t really wood, you can easily cut the top part off with scissors. Once you have removed the top, use a dab of hot glue to secure it to the back of the wire wreath form.
Notes